14 - Lighting
For creatives light becomes essential as soon as you leave the strictly graphical world. Light plays an important role in setting the scene and defining the mood. Think of the warm soft lighting during sundown at the beach, or a dark alley only lit by a lone flickering streetlamp. The lights alone can define the feeling we get once we look at an image. The same scene in different lighting can tell unique stories.
Setting light in the actual world requires artistic and technical expertise. The same is true for Unity. Any game engine has to deal with harsh restrictions of what is possible to calculate light in real-time. Though it is fascinating what is possible already. Yet, perfecting this becomes very, very technical and thus we will only look at the basics Unity offers.
Light Sources
Unity provides you with several light sources to create beautiful settings. We can create all of them from the hierarchy view, or by adding a “Light” component to any Gameobject.
The most basic light source Unity offers is the “Point Light”. It resembles your typical light bulb in the actual world. It shines light from the center point in all directions. The most basic settings include color, intensity and range. Range might seem odd, as you could expect intensity to be the driving factor in how far a light should shine, right? They both contribute to this. The range though is a hard limiter on the distance whereas the intensity is more of a soft value.
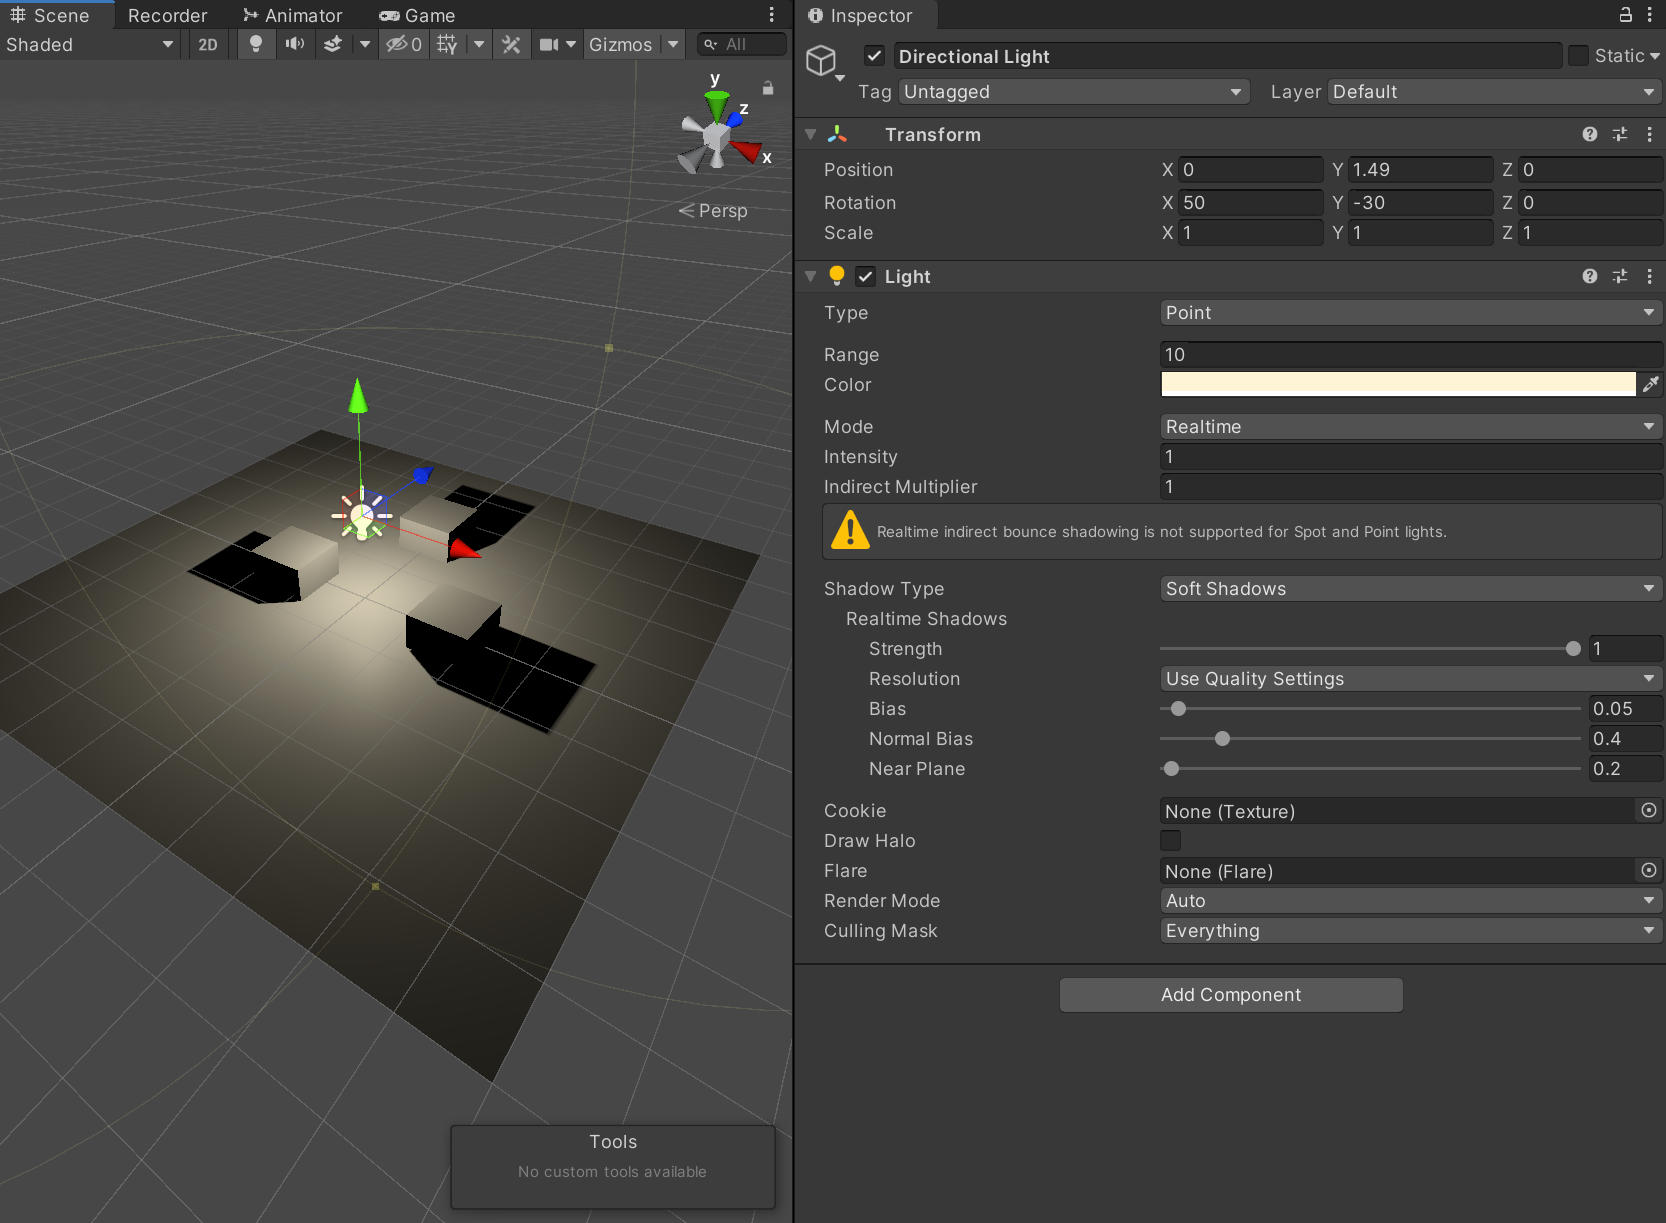
Pointlight in a scene
Next up is the “Spot Light”. The spot light shines light on a very specific spot and you can adjust the cone angle to be almost 180 degrees. It also features the ominous range value. The Spotlight is reminiscent of your typical flashlight.
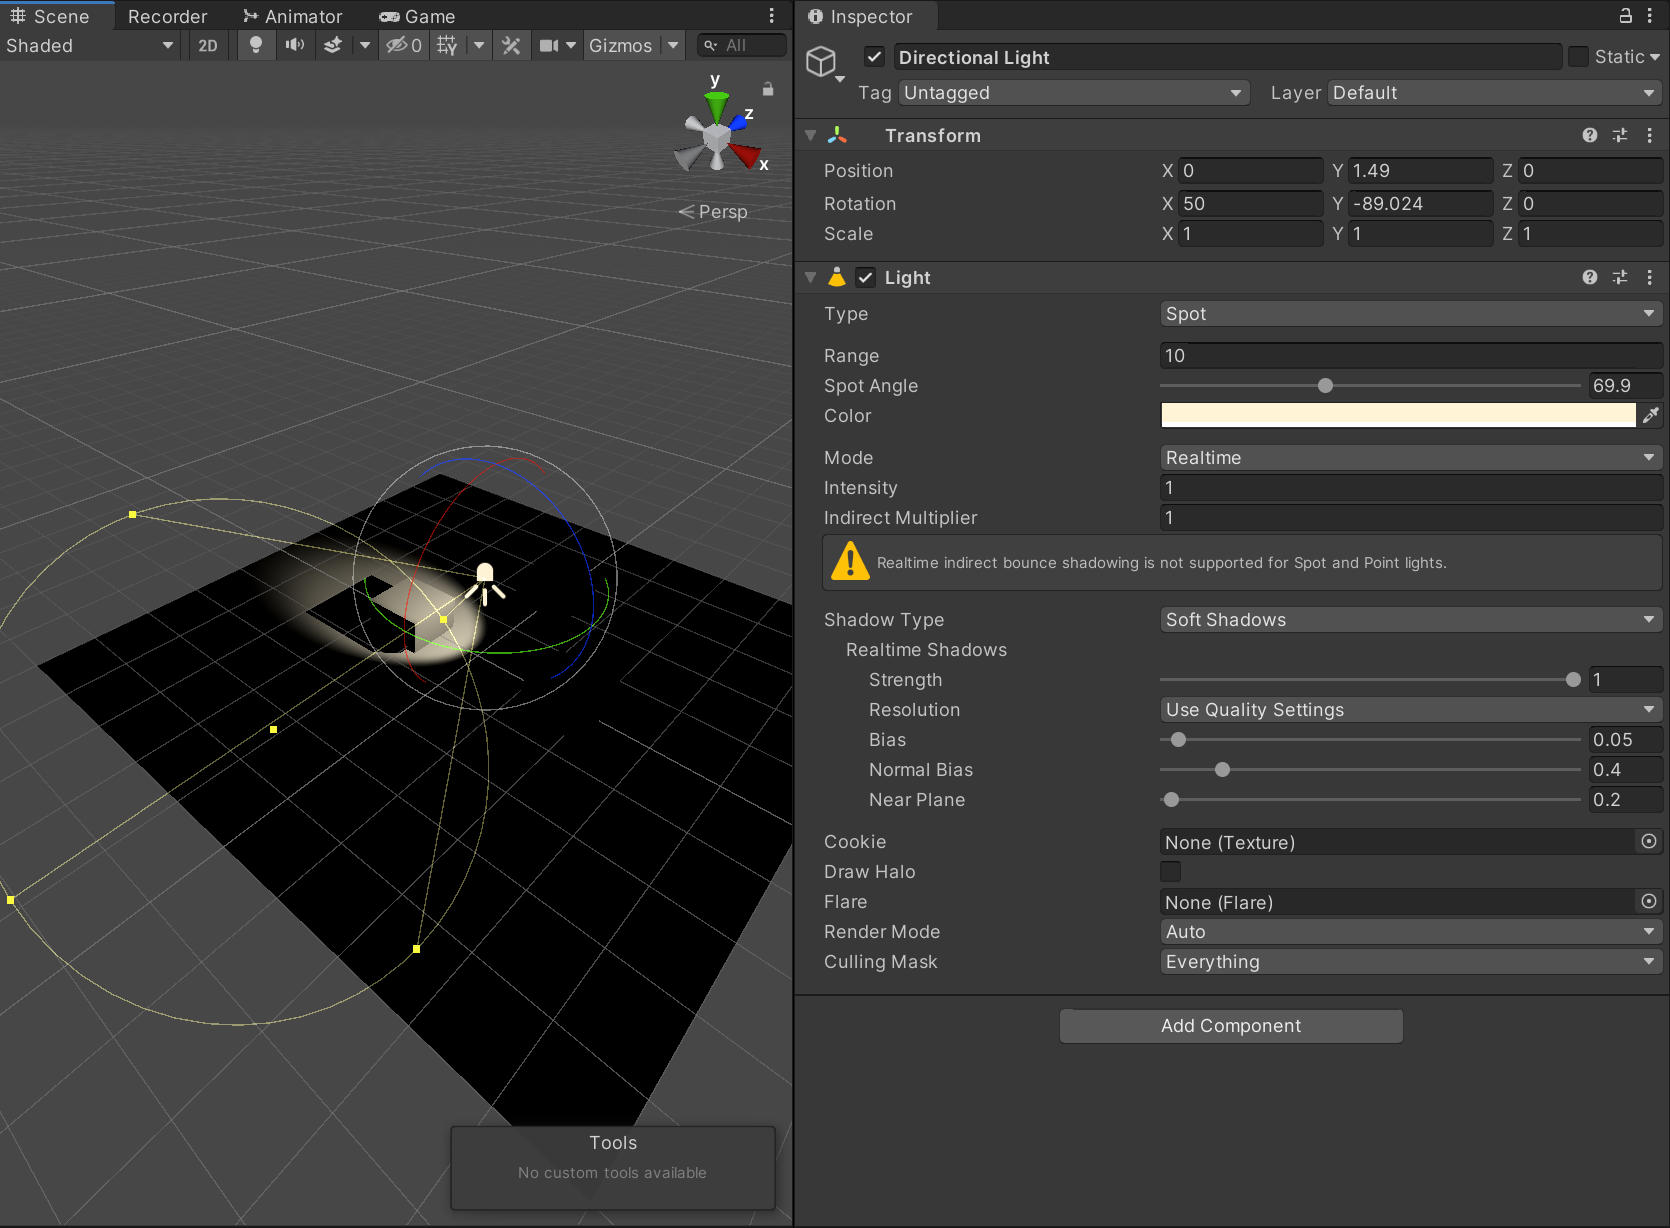
Pointlight in a scene
The “Directional Light” casts its rays in a perfect parallel manner into the scene. It is most often used as a sunlight. And while you might argue, that the sun is a perfect example of a point light, its distance from earth makes it acceptable to simplify it and make the light rays perfectly parallel in this context. Directional lights typically are your primary light source in the scene and they are also the least expensive to calculate.
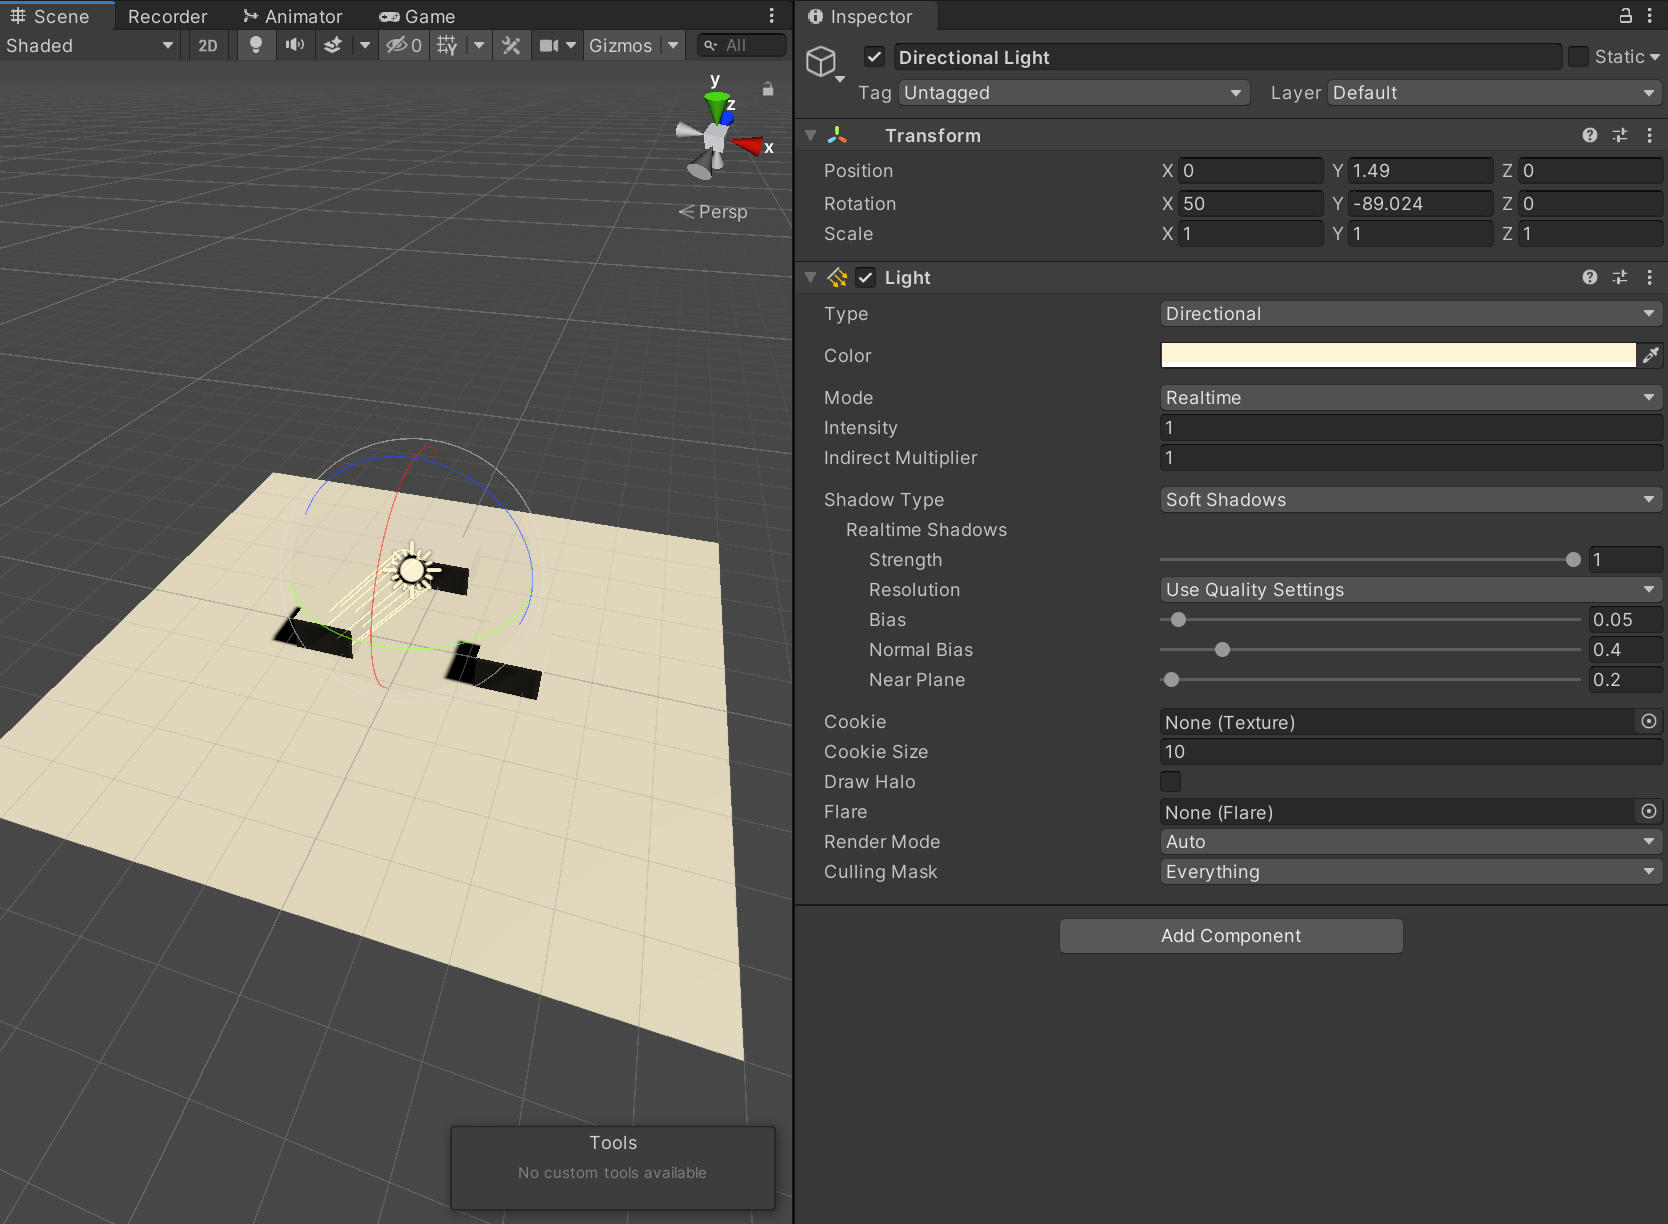
Pointlight in a scene
The last light source in the list is the “Area Light”. Again, you might argue that the sun is an area light. But these are abstractions and simplifications to improve the performance of a scene. The area light also right away shows you it is “baked only”. This means it’s contribution to the lighting of a scene has to be pre-calculated and will not update at runtime. This means you can’t move them around in your sketch.
Lights are expensive to calculate. You should try to limit yourself in the amount of lights you place in your scene. Finding the right balance between performance and looks is hard and takes time to learn. If you target a wider range of devices, you will definitely need to check performance on lower end devices extensively if you use a lot of lights.
We can do some simple sketches using these simple lights. We will also use textures to see how these interact with each other. Here we just use some small spheres with an unlit material and then add a light source inside of them. The movement is a simple sinus.
LightSinus.cs
How about doing a similar thing using spotlights?
NoiseySpotLights.cs
But we can also do more graphical work using lights and discarding textures. Directional lights e.g. give perfectly even lighting and thus can create a flat look.
Shadows
If you were curious enough to add a light into the scene already, you might have realized that all the real-time lights (Point, Spot, Directional) do not cast a shadow by default. You can enable them on the Light component by choosing either of the two shadow types: Hard or Soft.
Hard Shadows may not be very realistic, but they are fast to calculate. They are a superb choice if you want to deploy your program to lower end devices like phones. Soft shadows are slower to calculate but look much more natural. If you target PCs as a platform, these are splendid choice. Shadows come with a few confusing settings, and directional lights even have their shadow settings in the overall graphics settings. But mostly these are pre-configured rather well and you will only need to concern yourself with these if you run into problems.
On the above sketch for the directional light you can see one of those issues. The cube is placed perfectly flat on the plane, but at the edges you feel it’s slightly floating. You can’t fix some of these issues due to the way Unity calculates real-time shadows. A drawback all real-time applications face. You will need to have to wait for proper ray-tracing in real-time.
Real-time vs baked lighting.
As in the actual world, lighting can be a rather technical subject. The interactions of light in the real world are very, very complex and thus they are extremely resource intensive to re-calculate in the digital world. I will link to more advances discussions on the matter below.
Ray-tracing
To almost fully recreate the interactions of light rays in the environment, programmers invented a technique called ray-tracing. This technique shoots rays of light out into the scene and calculates how they interact with a surface. The rays then bounce further until a light ray has lost all its emissive power. If you only shoot out a single ray, this result is often very noisy. You can repeat this process and average out the results until you finally get an image that is noise free. But this process can take. From minutes up to hours depending on your hardware and complexity of the scene.
Yet. recent developments in hardware have led to ray-tracing becoming available in game-engines, but it is only available on high-end hardware. Thus we will not make use of real-time ray-tracing as of now.
To cope with these limitations in rendering power, Unity offers us two essential kinds of lighting. Real-time lighting and so called “baked” lighting.
Real-time lights are re-calculated on each frame. To handle this, they take quite a few shortcuts in accuracy: Real-time light doesn’t bounce around in the scene. Real-time shadows are sharp, or artificially blurred. And while this sounds depreciative, it is more than fascinating what you can achieve using these fakes. Again, these lights are real-time! This means they can change color or intensity at will. They can move. They are fully interactive! Which is great!
“Baked” lighting on the other hand is created using ray-tracing (s.a.) and then stored in image maps. The advantages of baked lighting are manifold. Light that bounces around a scene will create a much softer and more realistic look. You will receive proper shadowing in corners and soft shadows. But it also has its downsides. The pre-calculation process takes time and has to be re-done each time you change your light setup. Baking light generates image maps that apply to the object at runtime. These maps take up harddrive space and this will increase the shipping-size of your project.
Further more, baked lights require the objects in the scene to be “static”. Static objects can’t move at runtime. There are workarounds using so-called “light-probes”, which fakes simple global illumination onto moving objects, but these still require a static scene around them to work.
So how do you choose the best approach to lighting? Well, you can have both! You can select Lights and Objects which will never change to be static and thus be included in the light baking process. All lights and objects that need to be able to move around or change color can be left un-static and will be rendered as real-time objects. As light is always calculated additive, both rendering ways work fine together on an artistic level as well.
Unity even provides a third option: “Precomputed real-time global illumination”. This option will not calculate Light Maps but so called Light “Assets”. These Light Assets store information about how Light would travel through the scene and then interact with static objects. This means the light can change at runtime and these changes will at least affect static objects in the scene.
Lighting Settings
Now that we have some idea what happens in the background, let’s look at the setting this stuff up ourselves. The most important thing, and one that’s easily forgotten about, is defining all the meshes you want to be “Static”. You can find the “Static” check box right next to the name of an object.
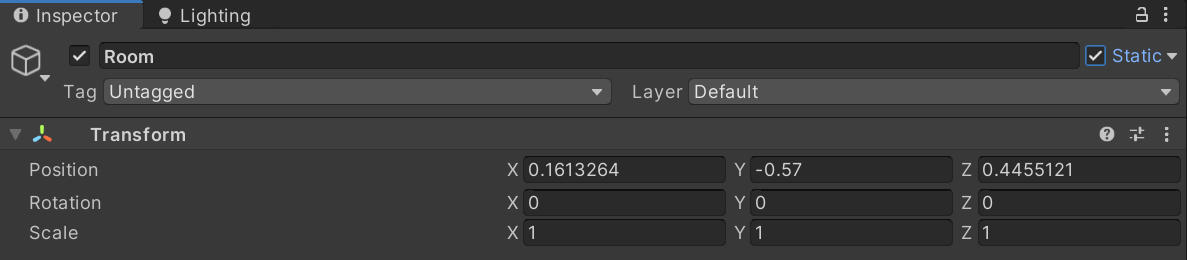
Static Setting
All lights and all objects that are supposed to be baked, need to have this checkbox enabled. This might even trigger the background baking process already. If a loading bar appears in the lower right corner and your scene textures “pop” sometimes, auto generation of lightmaps is enabled.

Auto Generate Bar working
To get some control on the creation of baked Lighting, we need to check the Lighting Settings. You can access these via “Window —> Rendering —> Lighting Settings”.
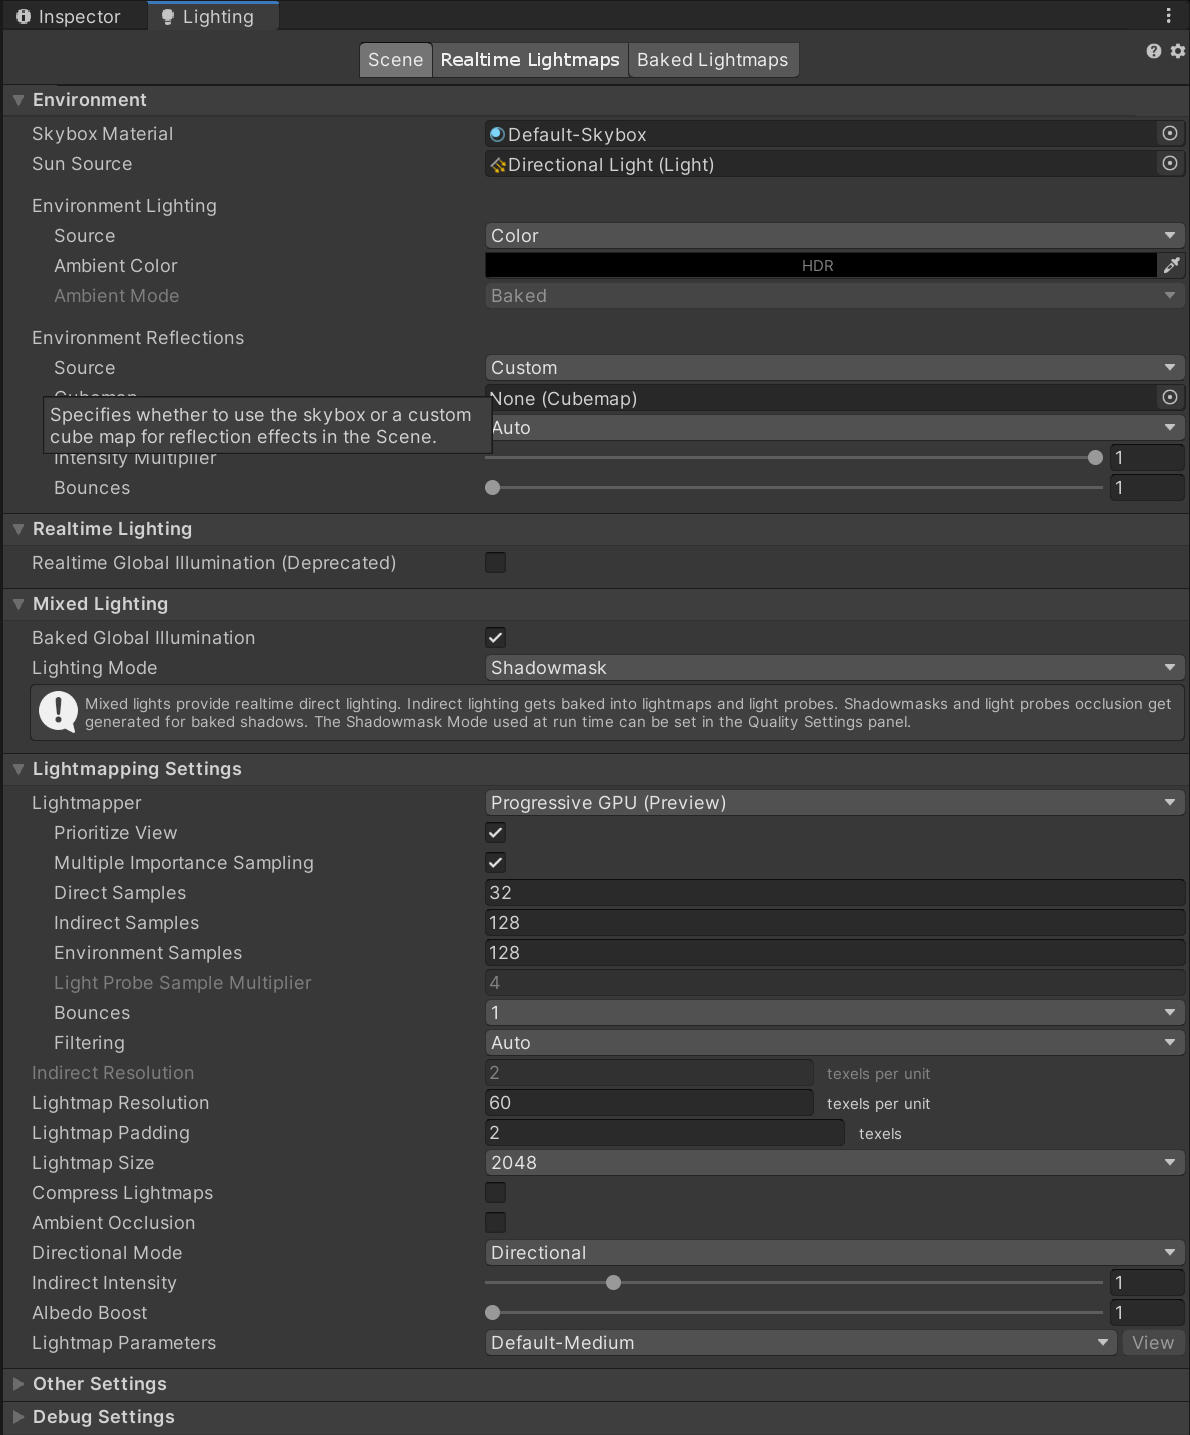
Lighting settings
The first group in the Scene tab is about the Environment. Environment meaning everything Unity renders if are no actual objects. By default, Unity has a Skybox set up for us. And in new scenes the default Directional light is set up as the sun. This leads to changes in horizon color when we rotate the directional light. In our topic of baking light, this horizon will lead to shadows tinted in the horizon color, as it is sampled as an emissive light source during the baking process. Yet you can also change this from skybox to color or gradient.
The next group just contains the checkbox for “Realtime Global Illumination” which is based on the “Enlighten” Engine. It is deprecated though and you shouldn’t use it anymore. It is still here for legacy reasons.
Next up is “Mixed Global Illumination” and this is the default now. It means running the real-time lights alongside the Lightmapped meshes. If you un-check this, you are disabling Global Illumination completely.
In the “Lightmapping Settings” you can define how your light is going to be baked and at which quality. By default the “Lightmapper” is set to “Progressive CPU” which will work on any PC. But if you have a fast GPU, you can also go with “Progressive GPU”. This can speed up things a lot. But it if you feel your results are off, switch back to CPU. On my old GPU, sometimes things messed up on GPU. Next are the settings for quality, I suggest keeping most of them to default for now and adjust them, if you feel the quality of your bakes is lacking.
But to speed things up I would take down the “Bounces” to 1 and for the start half the Sample values. You can bring them up again later.
At the bottom of the Lighting Tab you will find a “Generate Lighting” button and an “Auto Generate” checkbox. I disable this typically as I need not have a re-bake every time I move a Gameobject.
So let us use some of these things to get baked lighting going inside a scene. To do this, we will build a simple room with one side open to let some sunshine in. We will use plains to build our room.
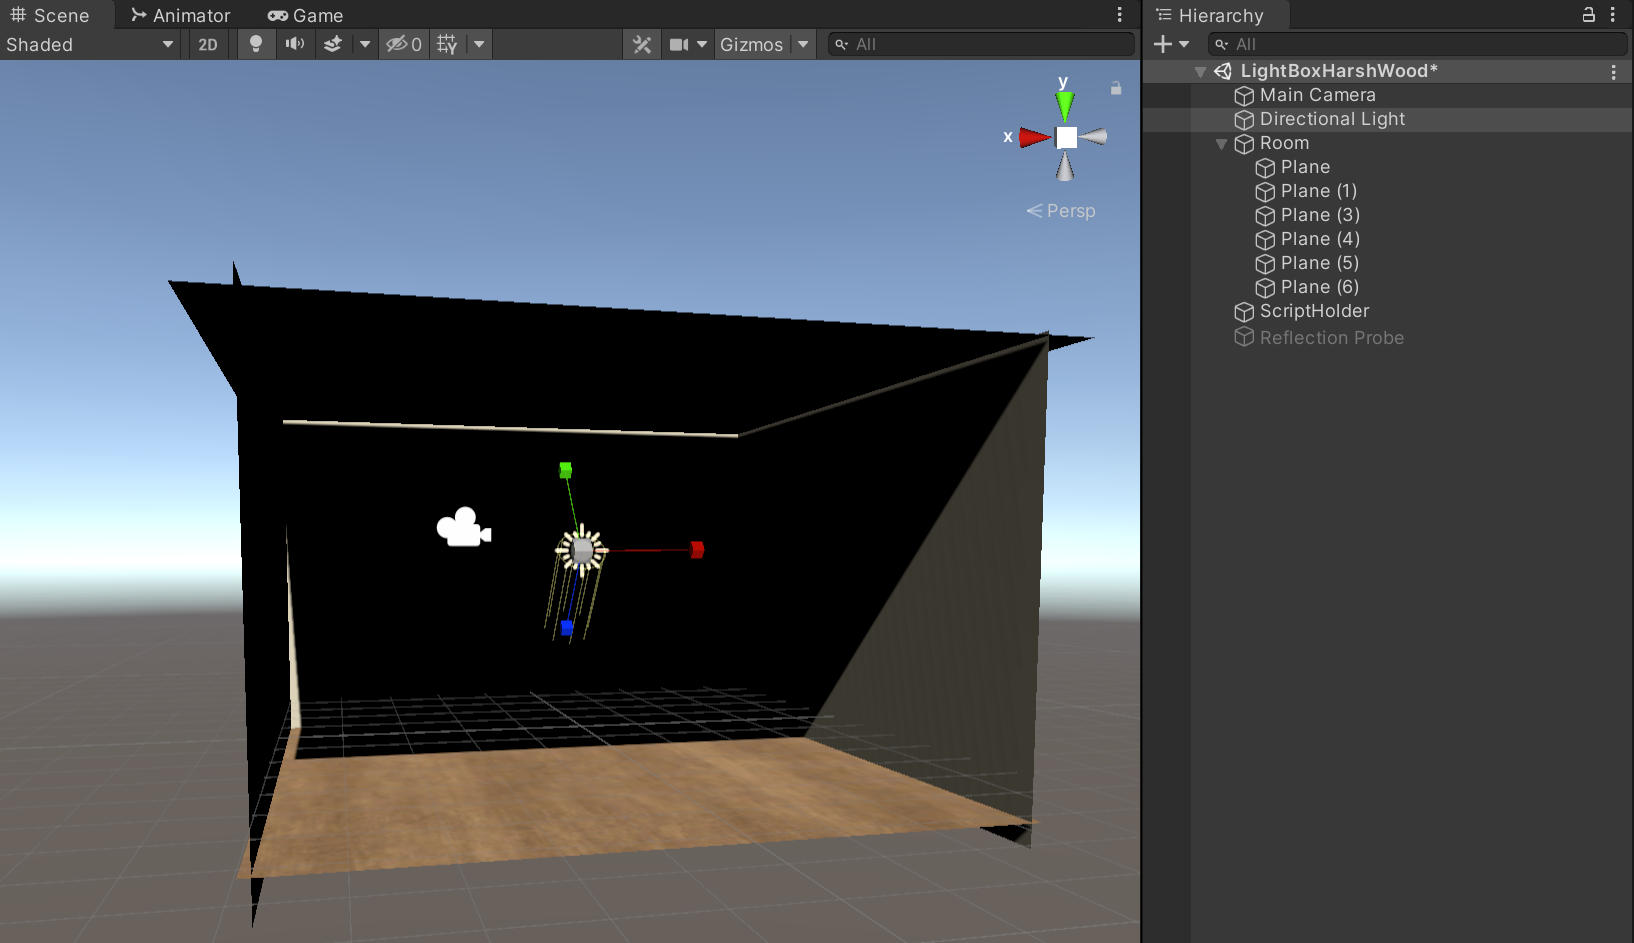
Simple Room
As you can see, we have some shadow issues on the left and the top, but we will ignore these. It is also noteworthy that I doubled the ceiling. As we can see through the back side of a plain, real-time lighting does so too. Thus we just duplicate it and rotate it by 180 degrees to have one of them face outwards.
Room lit without GI
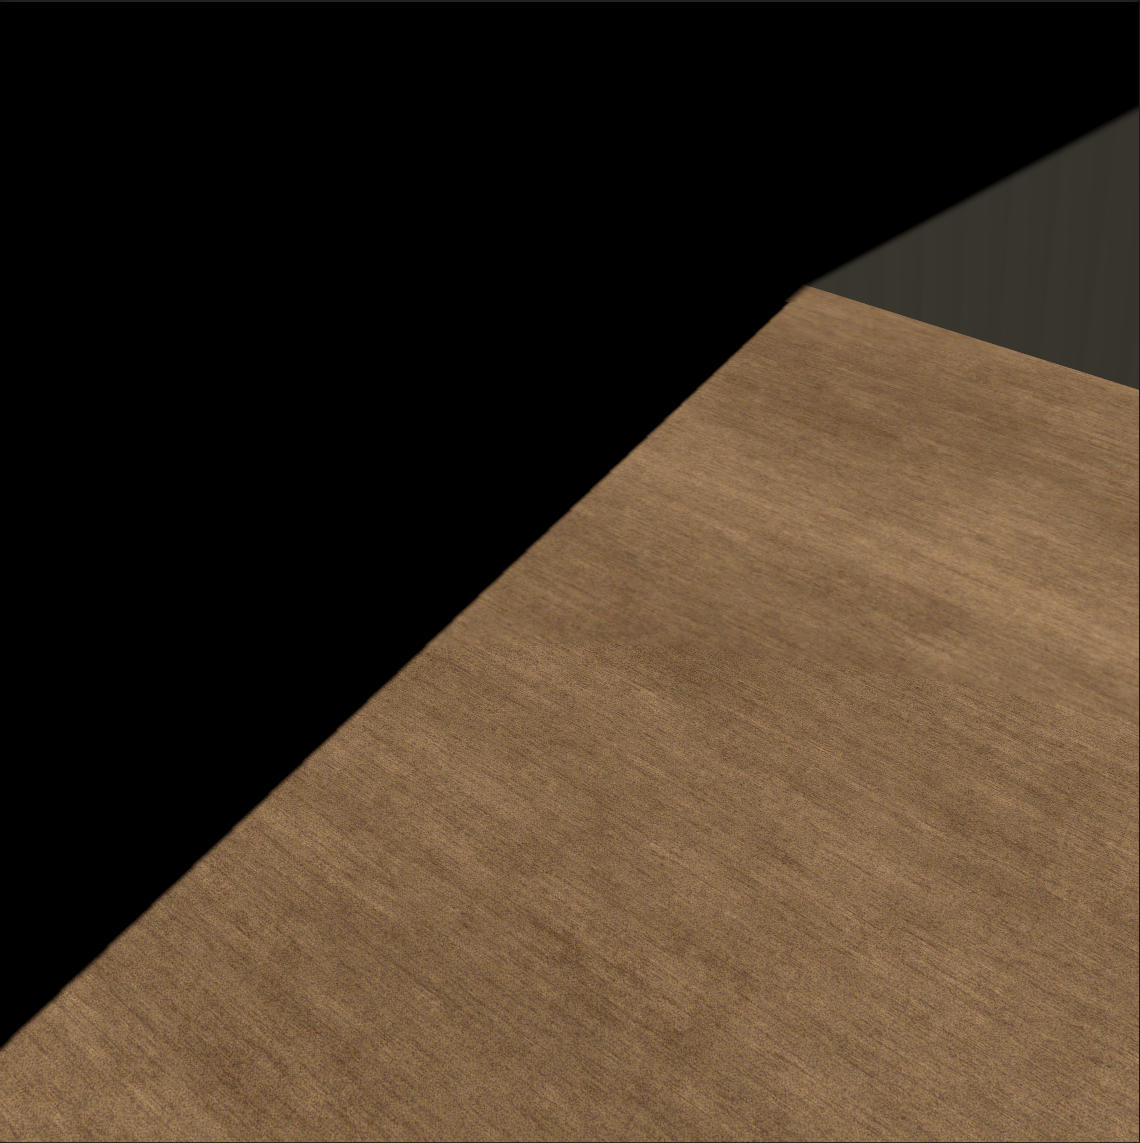
Positioning our camera will yield this result. But our shadows really are just black and dark. There is no interaction of light. So make sure you set all your planes to static, and you light and hit the “Generate Lighting” button on the Lighting tab.
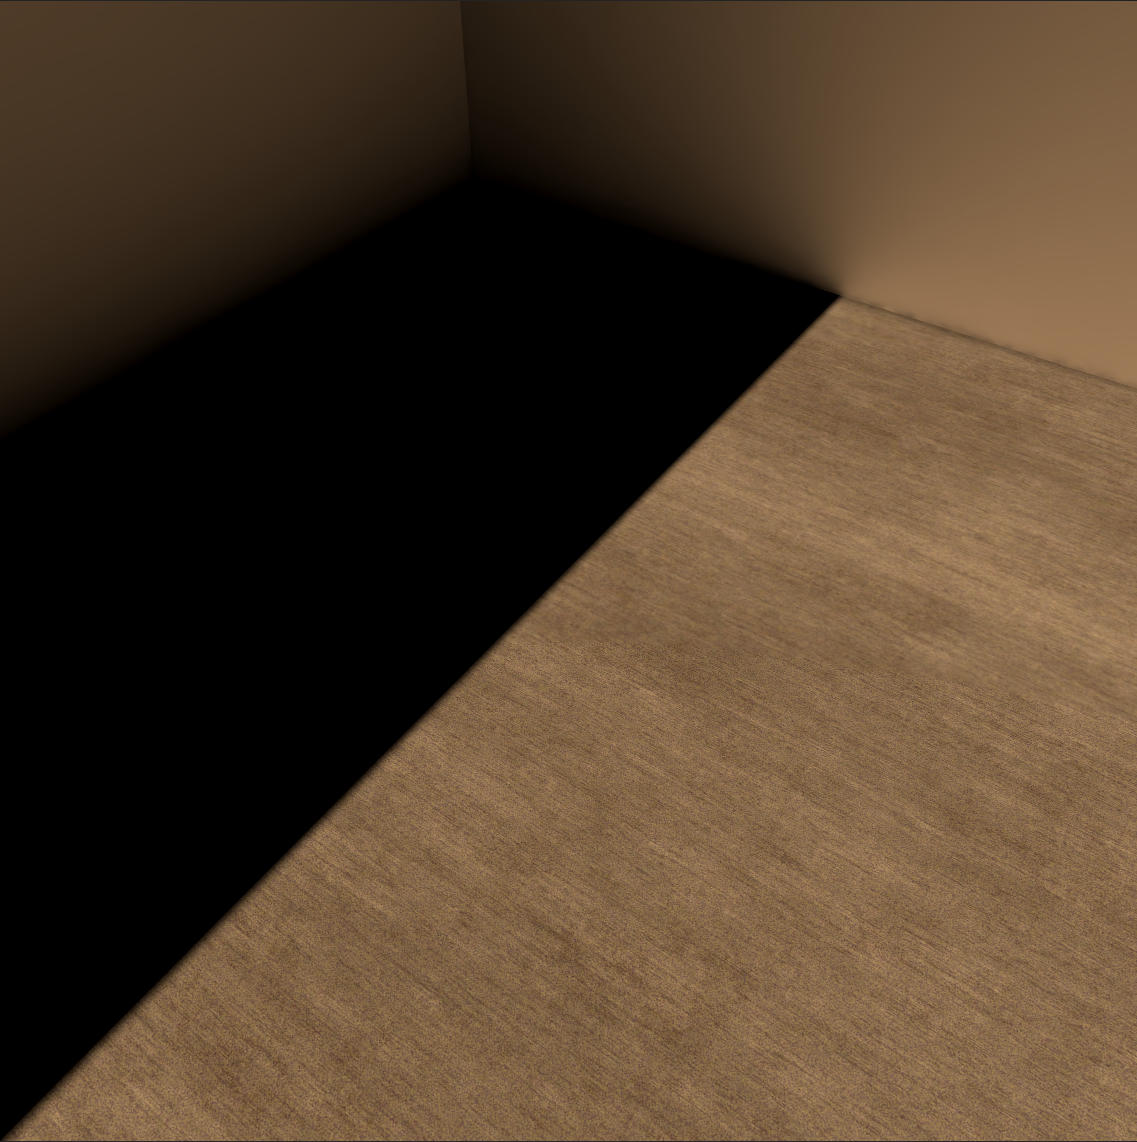
Room lit with GI
Once the bake finishes, we should see more complex interaction of light in the scene. You can see the bouncing light on the wall. I set the “Indirect Multiplier” on the directional light to 3 to increase this effect.
But if we instantiate non-static game Objects into our baked scene, they will receive none of the smooth light interactions. Their shadows are perfectly black, as no real-time light is hitting them. Thus we need a to generate this interaction. The first quick solution is to add reflections. Which is kinda wrong, as this would not help with object which don’t use reflectivity.
Reflection Probes
Another fake game engines use to get more realistic graphics are “Reflection Probes”. These are spheres you can position in the scene that take a 360 degree picture. It will then apply this picture will then to other Gameobjects as reflections.
In the settings of the reflection probes you can define the resolution of the reflection map and the volume it should affect. You can also define whether the reflection probe should be updated at runtime or also baked. Realtime update is rather expensive to calculate, so you will need to use a low resolution and should only use real-time update if you really need it.
Lightprobes
We discussed earlier that real-time global illumination is not a feasible. But again there is yet another fancy fake. “Lightprobes” work similar to reflection probes: they are spheres we place in the scene. Yet lightprobes do not capture a high-resolution image but store the incoming light at their position. They also need to form a net of lines between them. Any non static Gameobject between will be lit by the spheres it is located between. Unity bakes these lightprobes togther with other light sources in its baking process.
To create Lightprobes you add a Lightprobe object from the Light Menu in the Hierarchy. Unity will then display with four small yellow spheres. These are the positions at which it will capture the light.
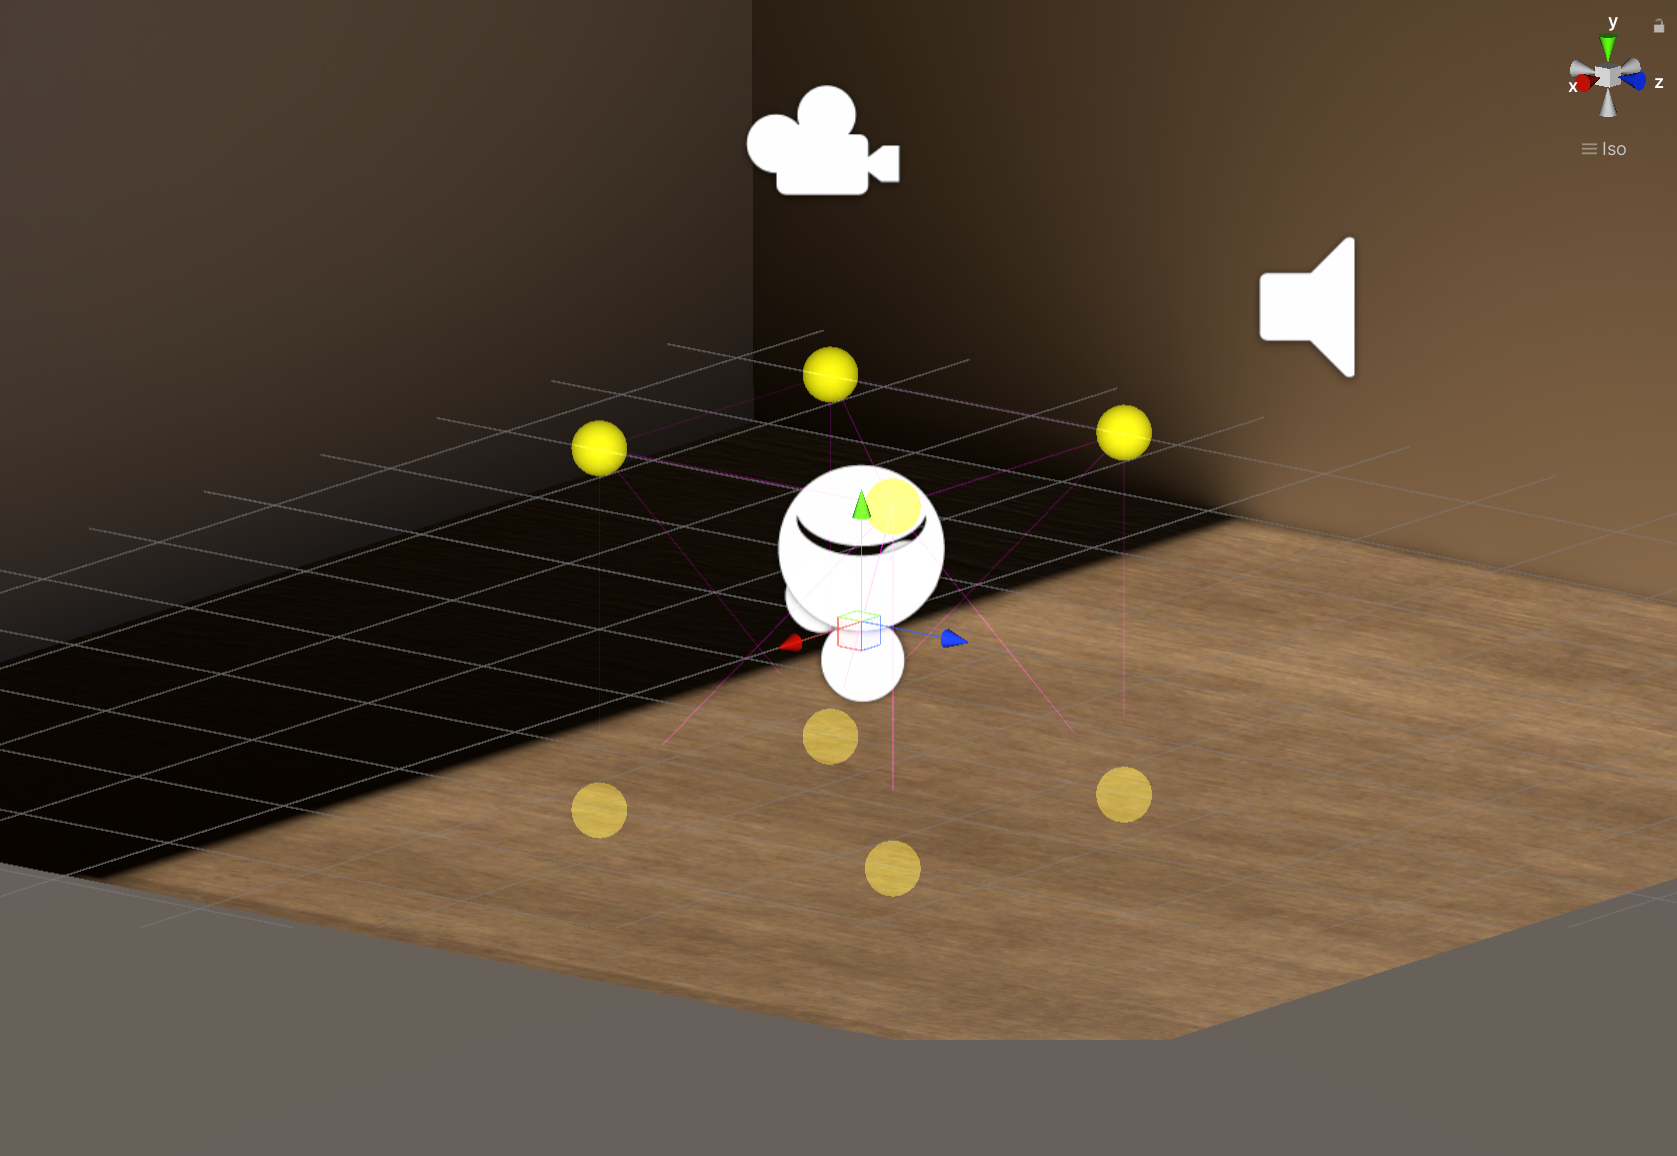
LightProbes
But these are just your starting point. Now you need to adjust them. On the Inspector choose the button to edit the lightprobes.
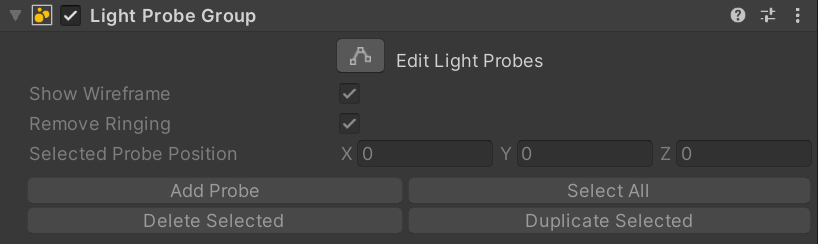
LightProbe Inspector
Now you can select them and move them around. Using the Inspector, you can also create new spheres or duplicate the selected ones. Using these tools create a web of spheres, predominantly in the places you need them.
This is what I ended up with:
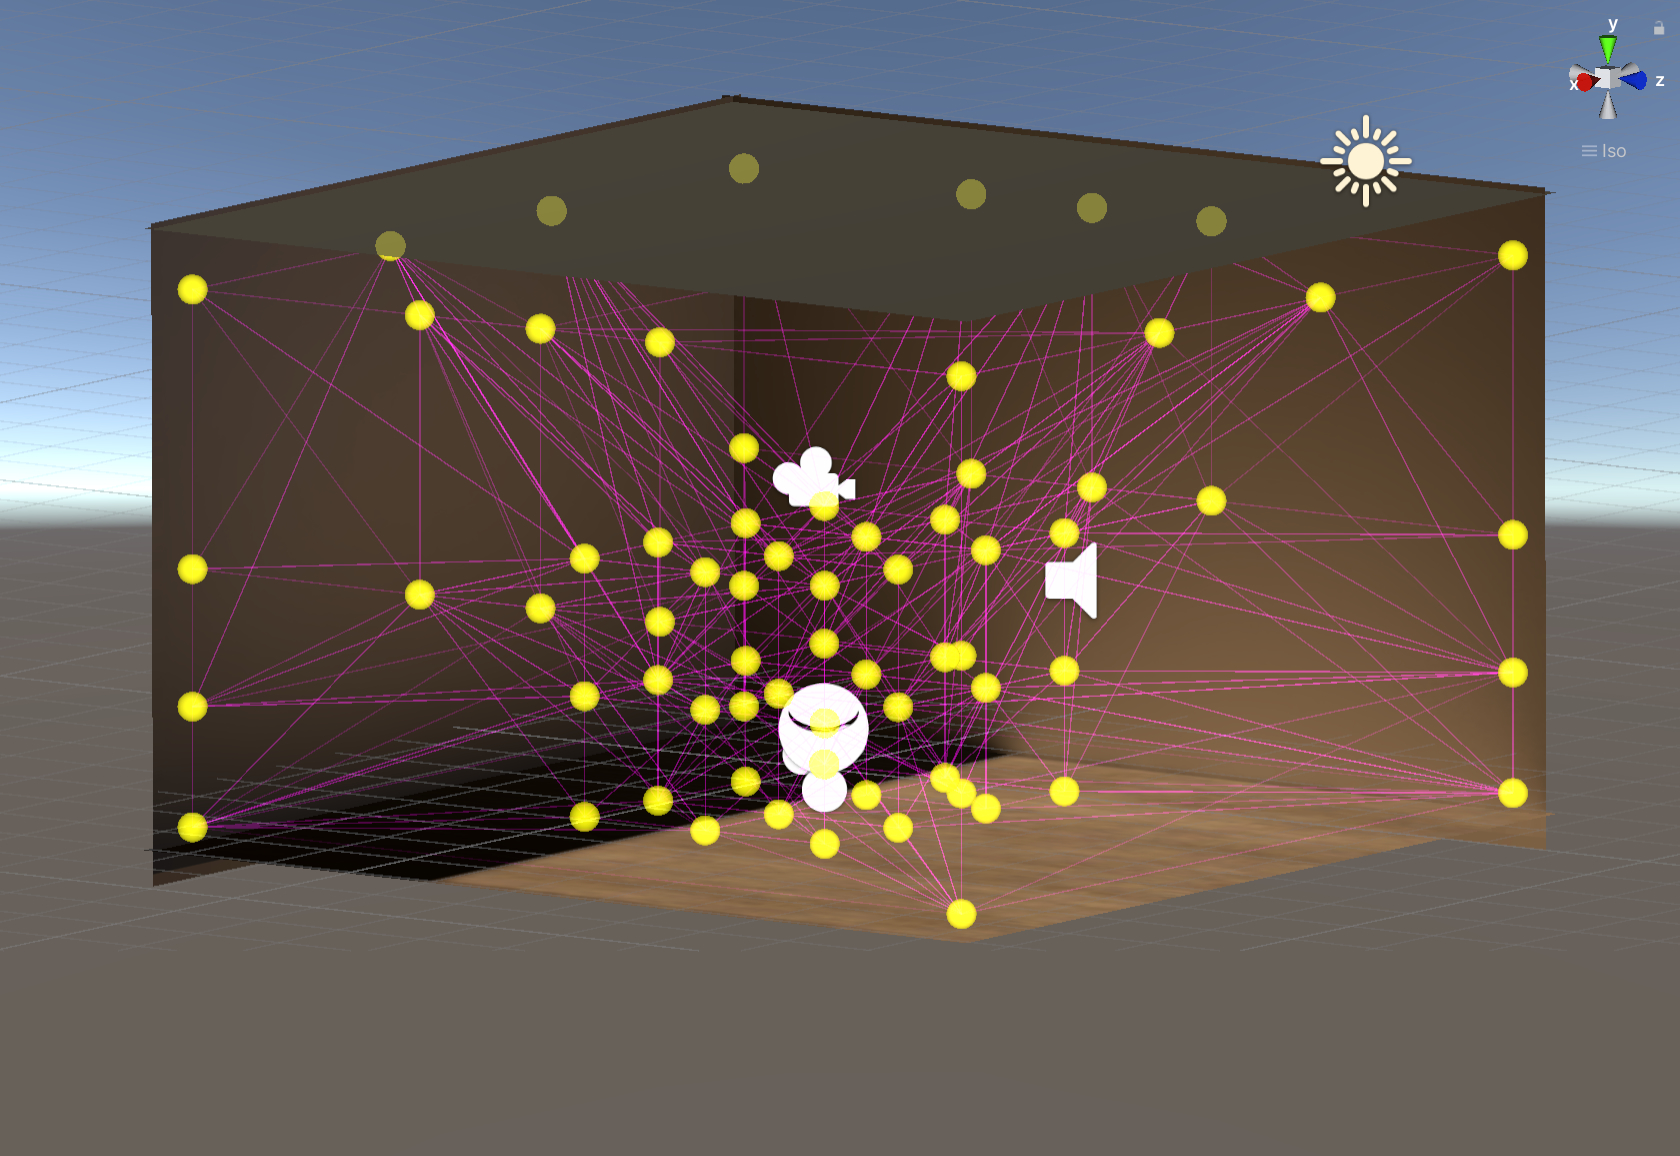
LightProbe Setup
And this is the visual result:
For these examples please keep in mind I increased the Indirect Multiplier on a few things to make the effect more visible. This might be too much Global Illumination.
Assets to increase light interactions
These cuboids we used so often have one terrible flaw. They don’t really capture light really well as they consist of perfectly flat planes. Curved surfaces bring out reflections and capture lights really well. So let us grab some cuboids with beveled edges.
For example, I also toned down the Indirect Multiplier again.
Additional resources:
Light for the visual artist - Richard Yot
Color and Light: A Guide for the realist painter - James Gurney