11 - User Interfaces
For many of these more “sketch-like” scenes, you don’t need any kind of user interface. But say you want to bring them all together to show off your progress. Creating a user interface to switch between all your scene would be splendid for that.
Thus, we will look at how to layout a User Interfaces (UI) in Unity and how the scripting setup for it works. We will also get our feet wet with Scene Management, which allows us to switch between scenes at runtime.
The User Interface Design
Before we dive into Unity, let’s take a moment to think about User Interfaces. If you read this book, you likely belong to the group of people who interact with UIs daily. And you experienced good and bad UIs. But what made the difference? It comes down to this: Keep it simple!
This means: Don’t reinvent the wheel. If there is some kind of interaction your user is used to, don’t break it. You should also know how your target platform (e.g. iOS or Android) deals with certain UI elements and how they look. If there is a common icon for a specific task, use that icon. For example saving: There are almost no floppy disks around anymore, but we still use the icon to save because everyone is used to this icon.
Also place your elements in a purposeful hierarchy. Emphasize important elements with color and size. You can even stress them through animation. Any animation catches our attention in an otherwise static composition.
You can also use animation to give feedback to the user. User feedback is important as it gives a sense of control. What your code does in the background is invisible to the user. Let the user know that he pressed the button by adding visual feedback. Find a way to show that there is some loading process running in the background.
A very simple UI Design
Let’s plan our design ahead of getting into the code. What elements do we need? When and where do we need them?
We generally would want to start with some kind of menu. It would allow us to start the actual sketches and maybe even access options or a help or info screen. We should also be able to close the application.
Once the application is running, we need options to switch between the sketches and also to go back to the main menu.
Here are some very rough ideas on how a UI for the menu of our sketch switcher could look like.
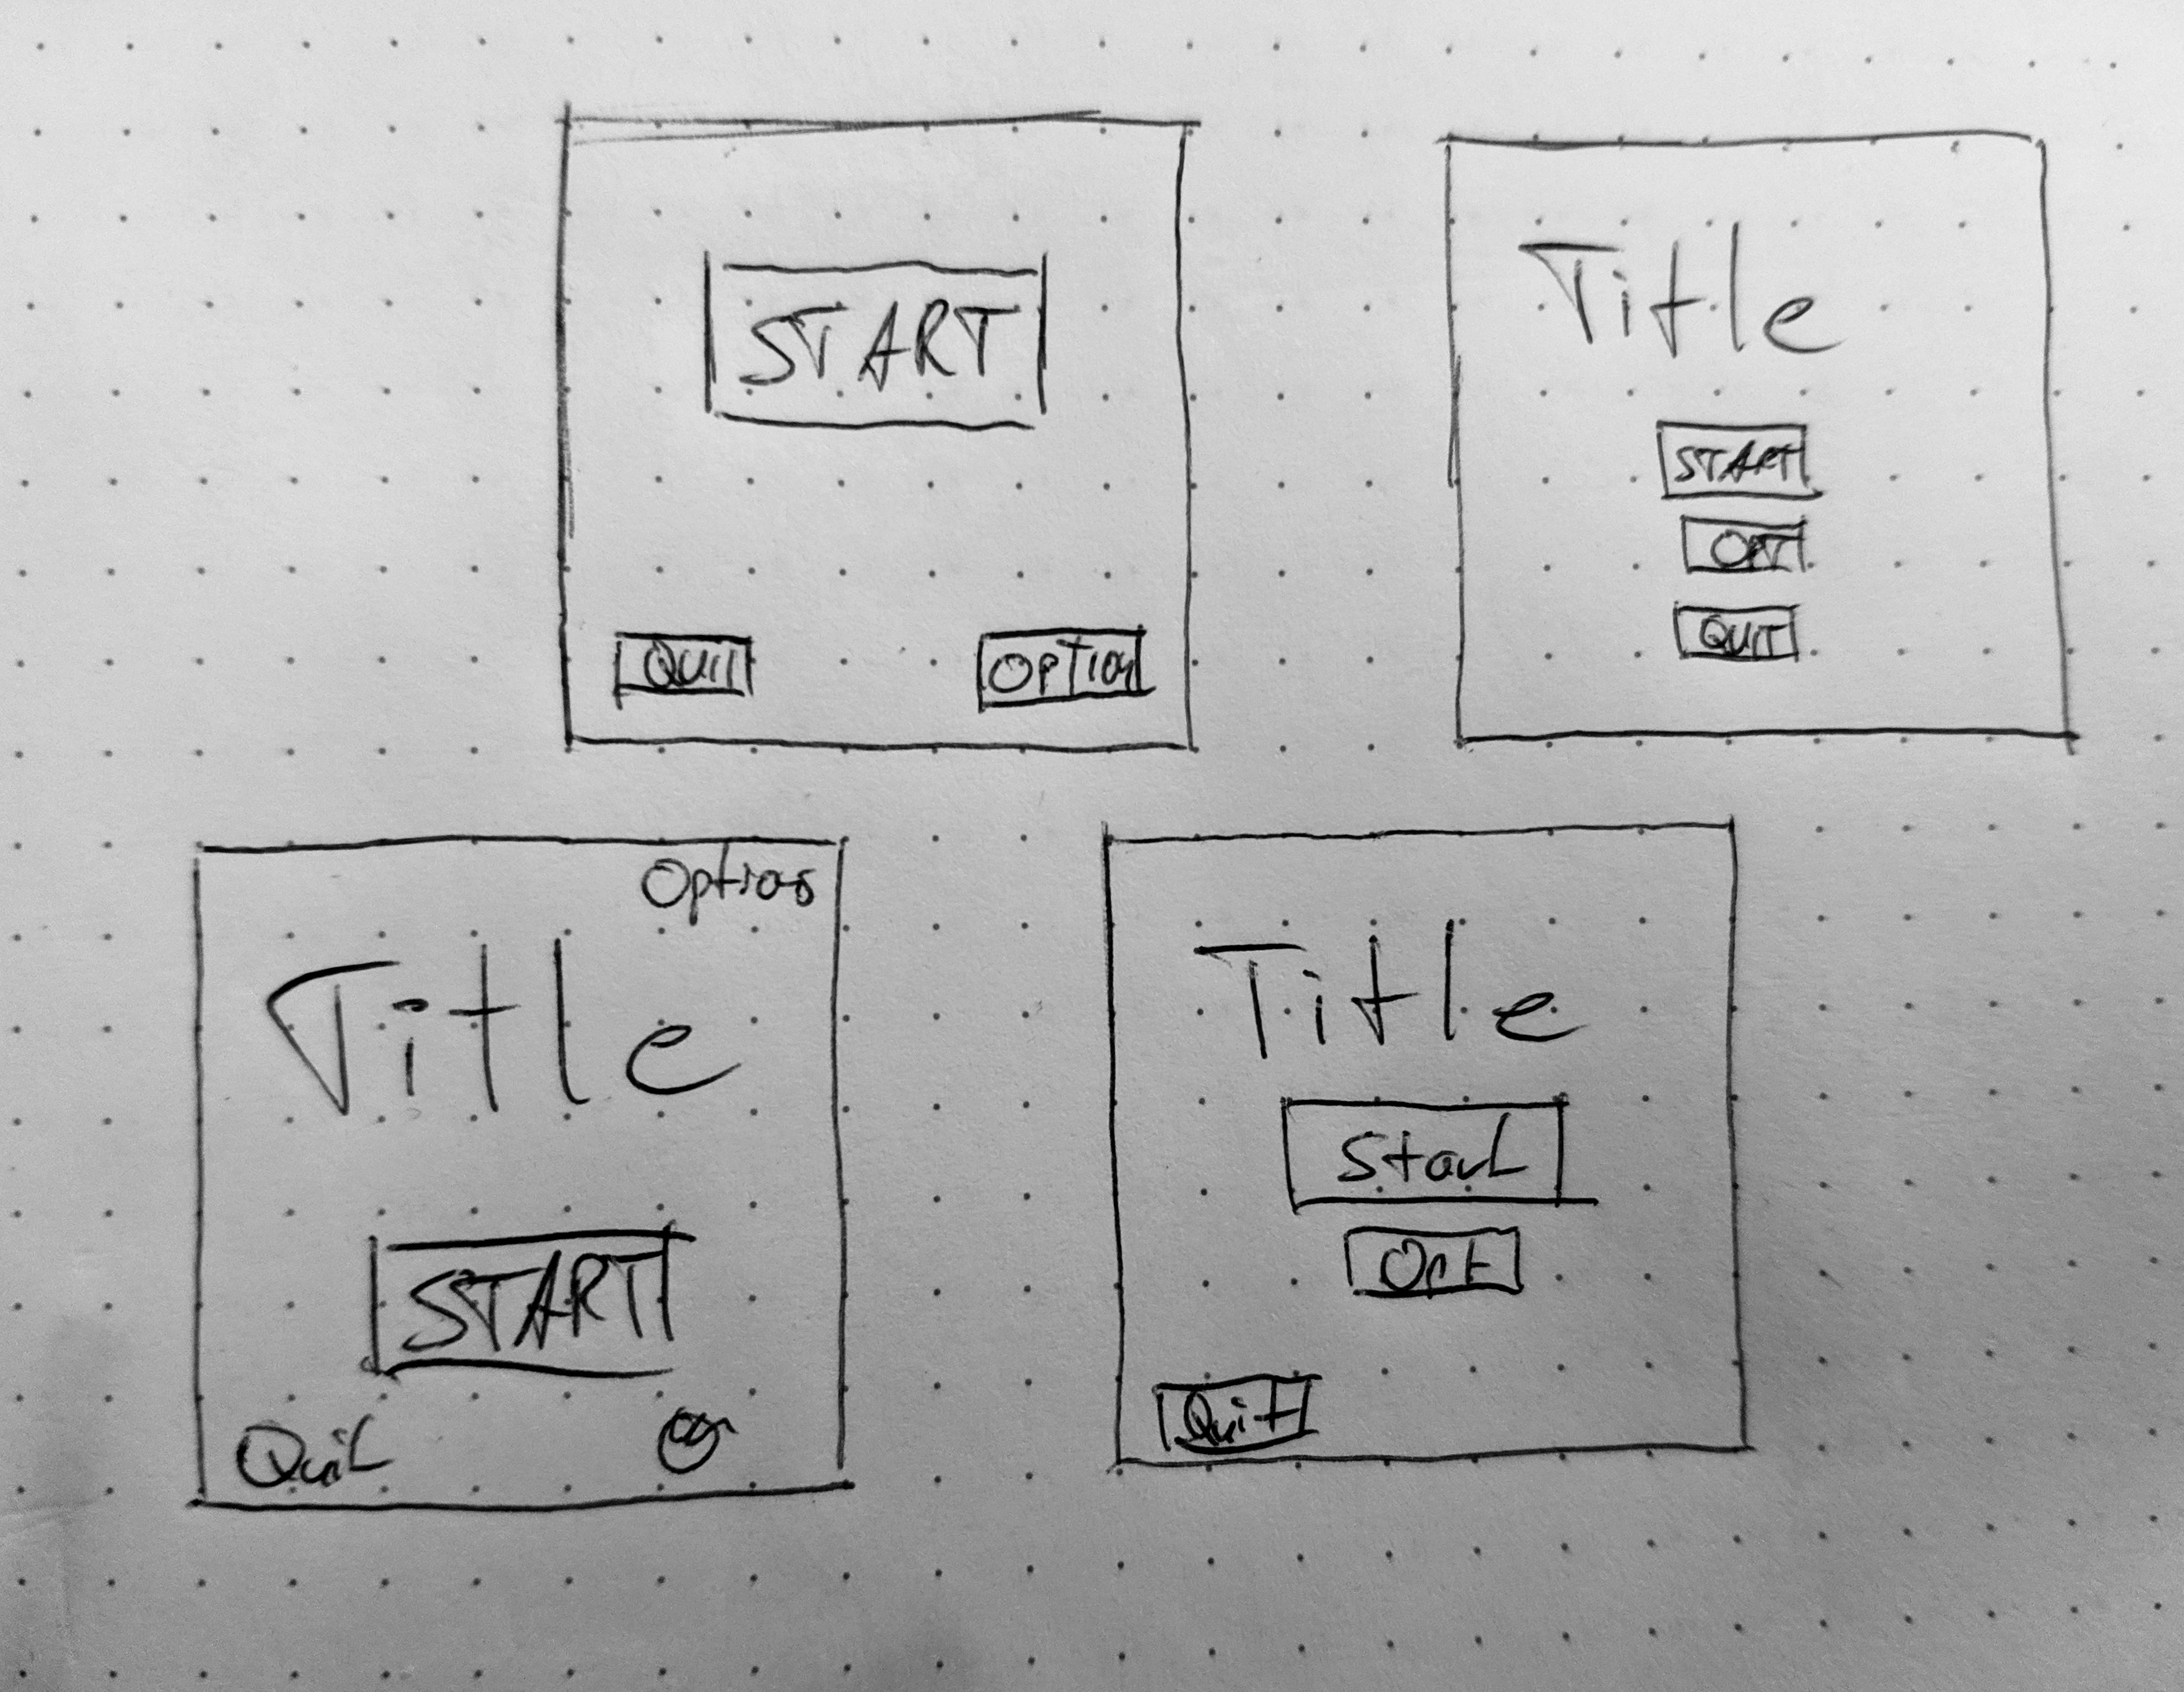
UI Sketches
Designing UIs on paper is a brilliant way to iterate fast. But we will see that designing your UI is something that can be easy and fun in Unity too.
Building the User Interface
To create UIs in Unity Right-click ---> UI ---> Button. This will create a Button UI element.
TextMesh Pro
You can choose between regular UI Buttons and “TextMesh Pro” Buttons. You can do more advanced text-styling with the TextMesh Pro elements. So if you fancy a little more advanced fonts, go for the TextMesh Pro ones. You will need to import the TextMesh Pro package first, but Unity will help you with that.
With the creation of your first UI element, Unity creates a set of elements at once. A Canvas, an EventSystem, and the button itself with a text element parented beneath it. The canvas holds all the UI Elements you want to place in your scene. Unity uses the EventSystem to deal with UI Input. You can simply ignore it, but don’t delete it.
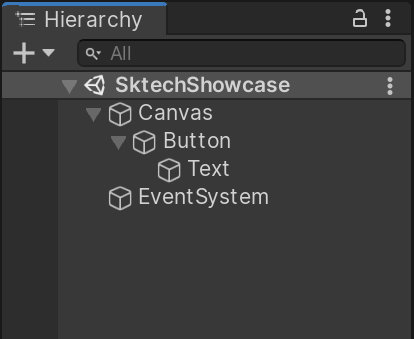
UI base elements
It also creates an enormous rectangle and a huge button in the Scene view. Unity does so, because it offers three ways to create your User Interfaces in your scene:
The first and default one - “Screen Space Overlay” - renders on top of your entire scene at runtime and is displayed in pixel size in the Scene view. Meaning each Unit in world space represents a pixel on screen. Press “2” to switch to the “2D” view mode to better see your UI.
The second option - “Screen Space Camera” renders in a certain distance from the camera but will stick to it. Camera settings like Field of View will affect its look. This is also interesting for post processing effects. If you would want effects like Grain applied to your UI, then this is the way to go.
“World Space” as the last option will render the UI in 3D space. This is interesting for Virtual Reality UIs or in Games where you want your character to be knowing about the User Interface. Imagine a screen the Character is interacting with.
We will stick to the basic Screen Space Overlay UI.
As always, one of our goals is to stay flexible throughout. Thus we will parent each of our screens to an empty GameObject. We use this to create templates. For reasons you will understand later, we will also create an Empty GameObject and parent our Canvas Object and our Event System and all of our screens below.
This way, we will bundle up the whole user interface section under one element. Now we can also turn on and off whole UI pages by just enabling or disabling the parent object.
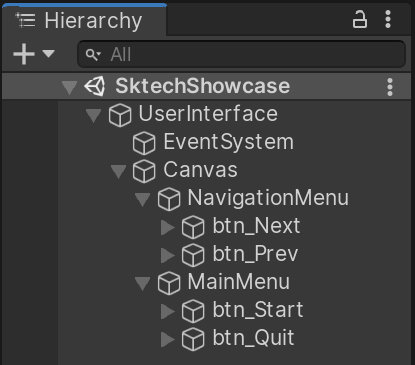
UI Page Hierarchy
Now you can see I already duplicated and named those Buttons and Screens, but we also need to change the text inside the buttons. To do this, we can just change the text on the text elements parented to each button. Here you can also find text styling elements.
If you don’t see this, make sure only one screen is enabled at a time. That’s what our parenting structure helps us with.
Next you can layout your buttons in the Scene view. Here Unity will offer you the “Rect Transform Tool” as the default way of manipulating UI elements. The Rect Transform is intuitive. You can drag on the blue spheres on the edges to scale your element. You can just use the blue circles in the corners to rescale the items and push them around. The Rect Transform tool will also show you lines when your buttons align to one another. Alternatively you can scale and move your buttons around via the inspector if you prefer to do that.
Button Components
In the inspector, you will now also see a “Rect Transform” component instead of your normal Transform component. While you can edit all your values just like before, the Rect Transform also has a menu for setting Pivot and Scaling Centers to pre-defined places. This is very important later when looking at responsive user interfaces. For now, just have a glimpse at it and know that it’s there.
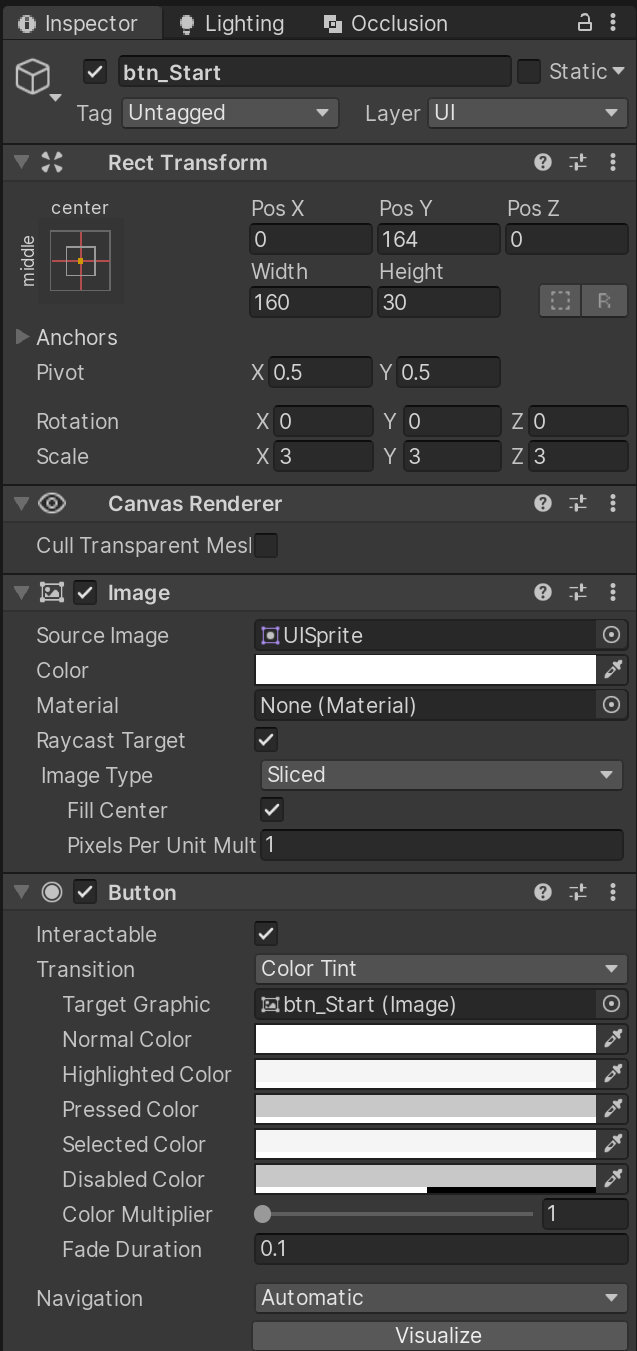
If you select one of your Buttons, you will notice an “Image” component and a “Button” component in the inspector. The image component is straightforward. You can add a Background Image to your Button if you like. This way you can bring in UI Elements you have designed in an image editing application. I haven’t done so and am also not very fond of the standard UI Sprite, so I set the Source Image to None.
The Button Component serves multiple purposes. For one, it handles the visual appearance of the button when you hover over it, select it and so forth. You can define tint colors and alpha here as well as the duration it takes to fade between these values. This is great to give feedback to the user, as we discussed earlier.
The Button Component also handles what happens once you click the Button. But to have it do something, we need a script!
Building an application
To talk about scripting this, we need to take a little intermezzo and talk about Scene Management and how to build or deploy your app.
To create a self-contained application from your project, we need to go through a process called “building”. Building your application is platform dependent, and the simplest variant is to build for the platform you are working on right now. To open the Build Settings, go File ---> Build Settings... or press Ctrl/Cmd + Shift + B. This window will pop up:
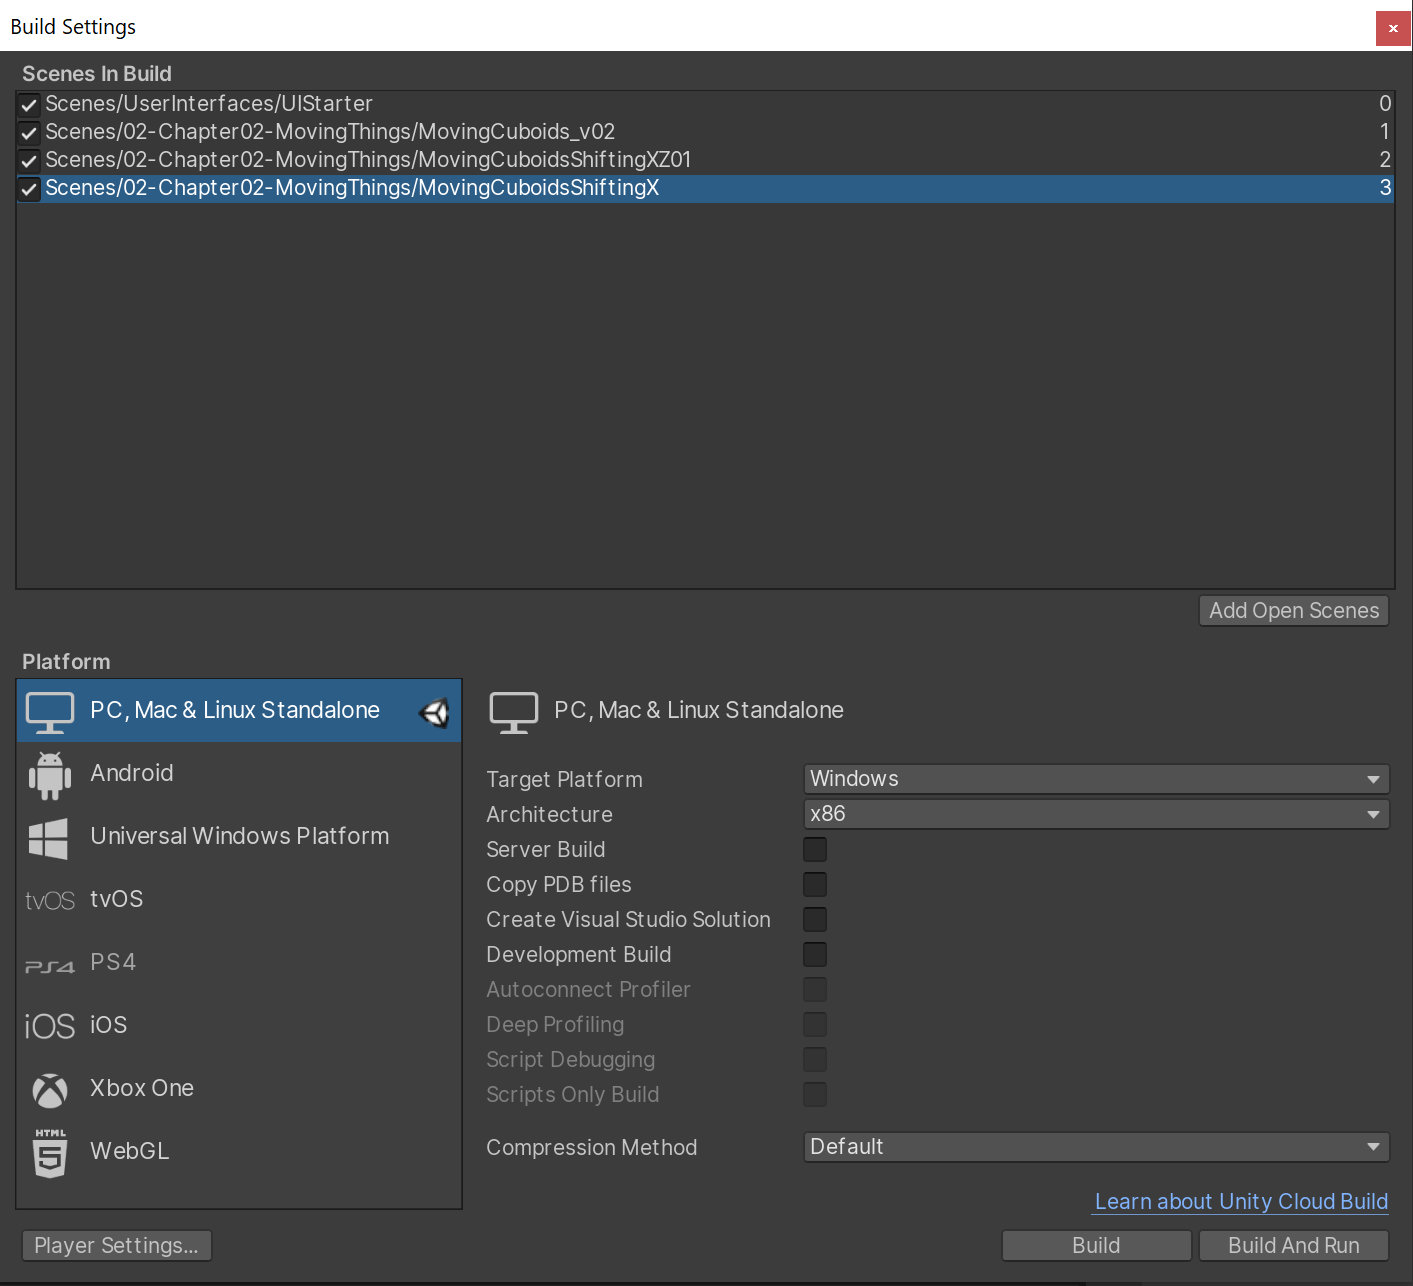
Build Settings Dialog
On the top of the window, you will find a list of all the scenes that are included in your build. You can then drag and drop more scenes in here. See the numbering on the right side? This will be the order in which Unity loads the scenes. If you load your scenes by increasing the build index, that is. Which is the approach we will look at.
In the bottom left you find your selected platform. By default this should be set to “Windows, Mac & Linux Standalone”. If it isn’t, select that entry and click the “Switch Platform” button. Once you have the scenes added you want to include, you can press “Build and Run”. Unity will ask you to select a folder in which the finished build should be placed. If there are no errors in your project Unity will then run the project from that folder. This will load the UI Scene, but the buttons still have no functionality.
User Interface Scripting and Scene Management
So what do we want to achieve?
-
Have a Start button that loads our first sketch/scene.
-
Have two buttons to navigate back and forth between sketches/scenes.
-
Switch between the Start Screen and the actual Scene Navigation Screen.
-
We want to keep our User Interface, so we don’t have to embed it into every Scene.
-
Have a Quit button to leave the application.
Scene Management in Unity uses the UnityEngine.SceneManagement namespace. It allows you to load and unload scenes at runtime. It also has access to all the information about how many scenes it staged in the build. We also have different methods of loading our scene. We can either provide the actual name of the scene or put in the index from the Build list. In an App where we want to just go through them one by one this is the more convenient way of loading scenes for us. So let’s look at the script.
SketchSwitcher.cs
We have the Scene Management namespace included and got rid of all the default Unity methods, because we don’t need them. The first method we created will load the first sketch.
The key methods we are creating are StartSketches(), NextSketch() and PreviousSketch(). These are the ones we will call at runtime. They rely on a few other methods. The other methods will first check for the current BuildIndex number and the increase or decrease for Next and Previous, respectively. Before calling the load function, we will check if the scene we want to load exists. This is necessary to avoid “Null Exception Errors”. The SceneManger.LoadSceneAsync() will then load the new scene.
We also added a method for the Quit button in our main menu.
Now to get our buttons working, we need to add our script somewhere into the scene. You can either add it to our “User Interface” GameObject or add it to the canvas. It doesn’t matter. It just has to be somewhere on our User Interface tree.
Next we need to connect these things up. And this might be a little weird in the beginning, so stick with me:
-
Select the first Button you want to add functionality to.
-
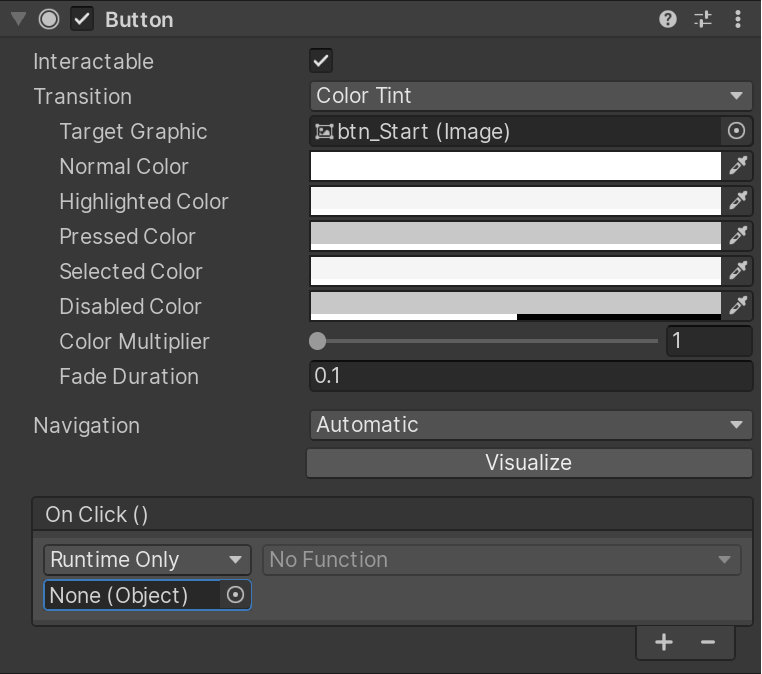
Click the little
+in the lower right corner of the OnClick() area on the button component.
Button Component
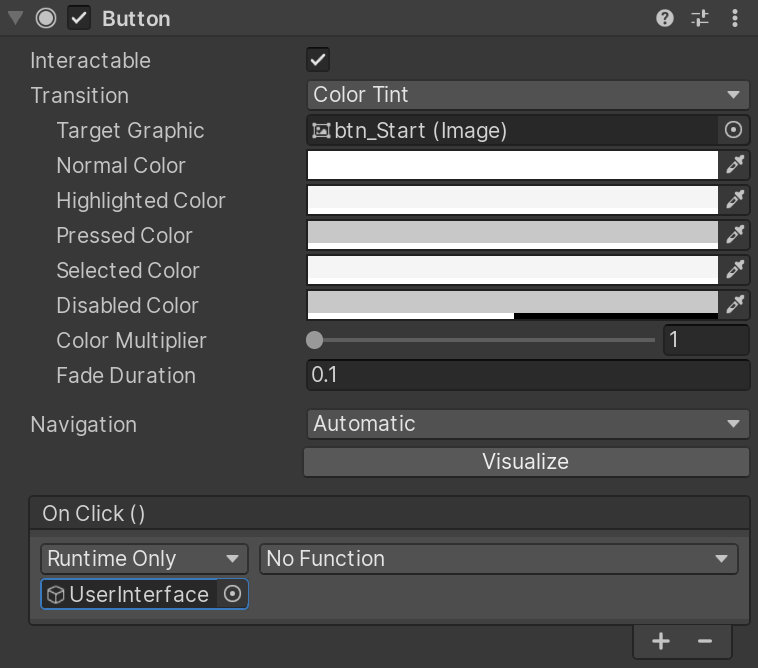
- Drag and Drop the GameObject you added your script to into the empty slot on the “OnClick” field on the Button Component.
Added GameObject
- Then right next to that field a drop down menu becomes active. From this drop down menu select the script we wrote and the method that should be called when the button is clicked.
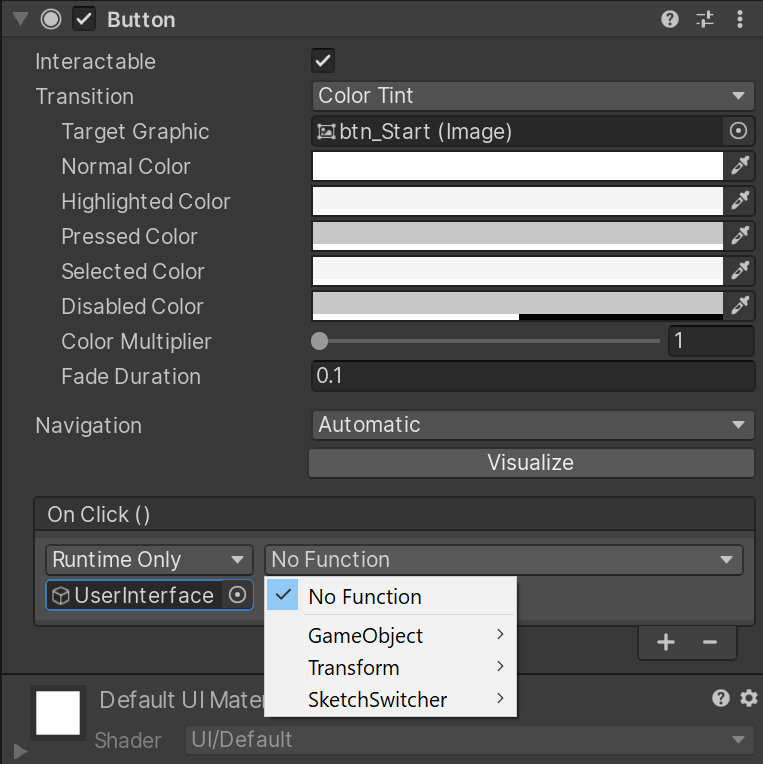
The Dropdown
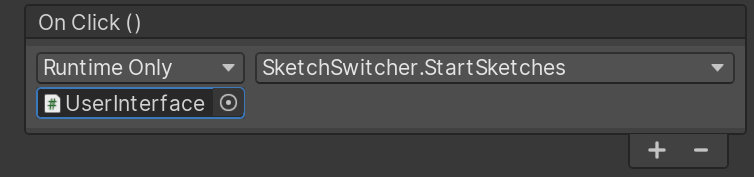
Selected Method
- Repeat this for all the Buttons you want to set up.
Another little “Gotcha!” with this is, that all functions you want to show up in that list, have to be public.
If you want to set up a “Back” button which takes you back to the menu make sure to switch between your UI pages again.
Retaining the UI
If you run your code now, you will run into trouble. Scene Management by default assumes that once you load a fresh scene, you want to get rid of the scene you are in. Which makes perfect sense, I guess. Yet this means we will instantly lose our user interface when we click the Start button. Thus, we need a way to keep our user interface. To do this, Unity offers us the DontDestroyOnLoad() method. Any object calling this method will not be destroyed in a loading process. And that’s why we added another GameObject as parent for our Canvas and EventSystem. We need both of them to survive. Now we can just add a script calling DontDestroyOnLoad() to the parent GameObject:
using UnityEngine;
public class DontDestroyOnLoad : MonoBehaviour
{
    void OnEnable(){
        DontDestroyOnLoad(this.gameObject);
    }
}
Enabling and disabling elements
Now there is still one problem remaining. If we press the Start button, it will still be present on top of our next scene. Worse still, our navigation screen is invisible still. There is no change at all. For small menus, there is an easy fix for this. We can add more events to the OnClick event on the Button component. On the Start button add two more events to the OnClick list. Then drag and drop the StartScreen and the NavScreen GameObjects from the hierarchy in these slots. This time choose the GameObject ---> Set Active (bool) from the menu. Then check the box for the NavScreen and un-check the checkbox for the MainMenu Screen.
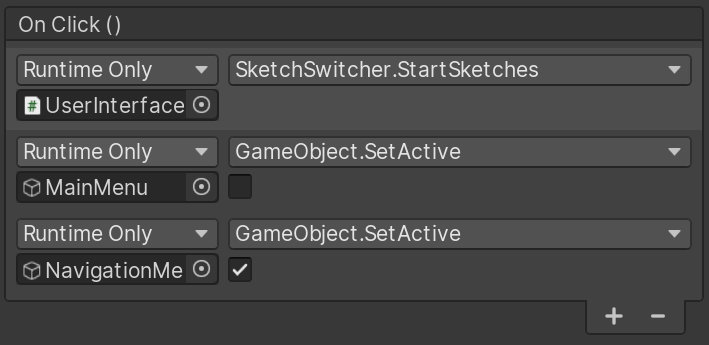
Selected Method
If you haven’t yet disabled the Screen_NavMenu in your scene, do it now in the editor.
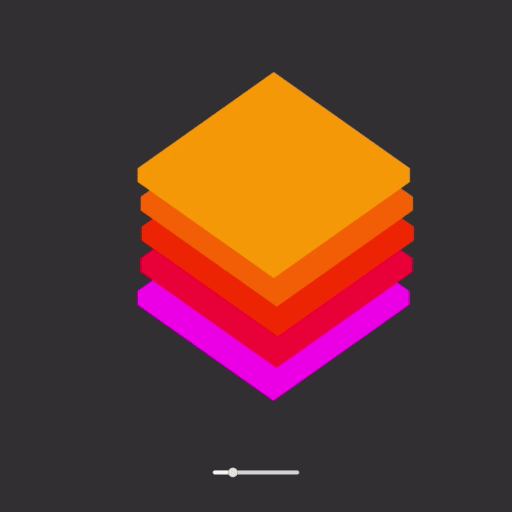
And now you have a working user interface that you can use to show off the sketches you have created so far.
This is what you should be able to end up with:
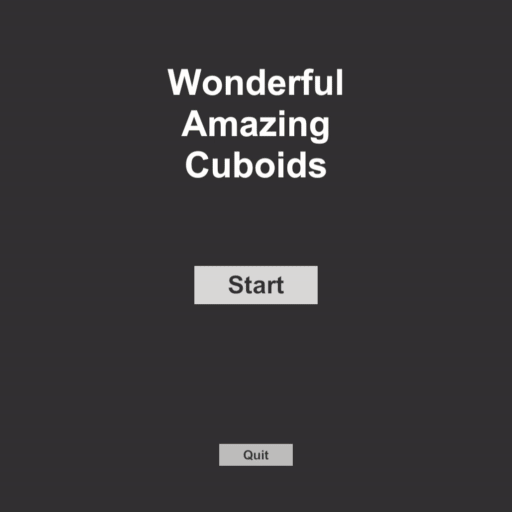
UI for Showing of Cuiboids
Projects
Project 1 - Controlling Sketches with UI
You can also give your users some control over your sketches using Unitys UI elements. We could for example control the speed of an animation using Sliders. To get this working, we need to take care of a few things. We need a method which we can access in the scene which will communicate the changed value to the gameObjects we want to affect.
Thus we will add this method to the one of our sketch manager. I.e. one of the MultiCuboids.
We will also need to add a speed parameter to change on our CuboidPrefab and have it set to public.
Once this is set up, we can add connect up the slider in the Editor. A specialty here is the way you have to connect the slider. You will have a look for the Dynamic Float variant of method we created.
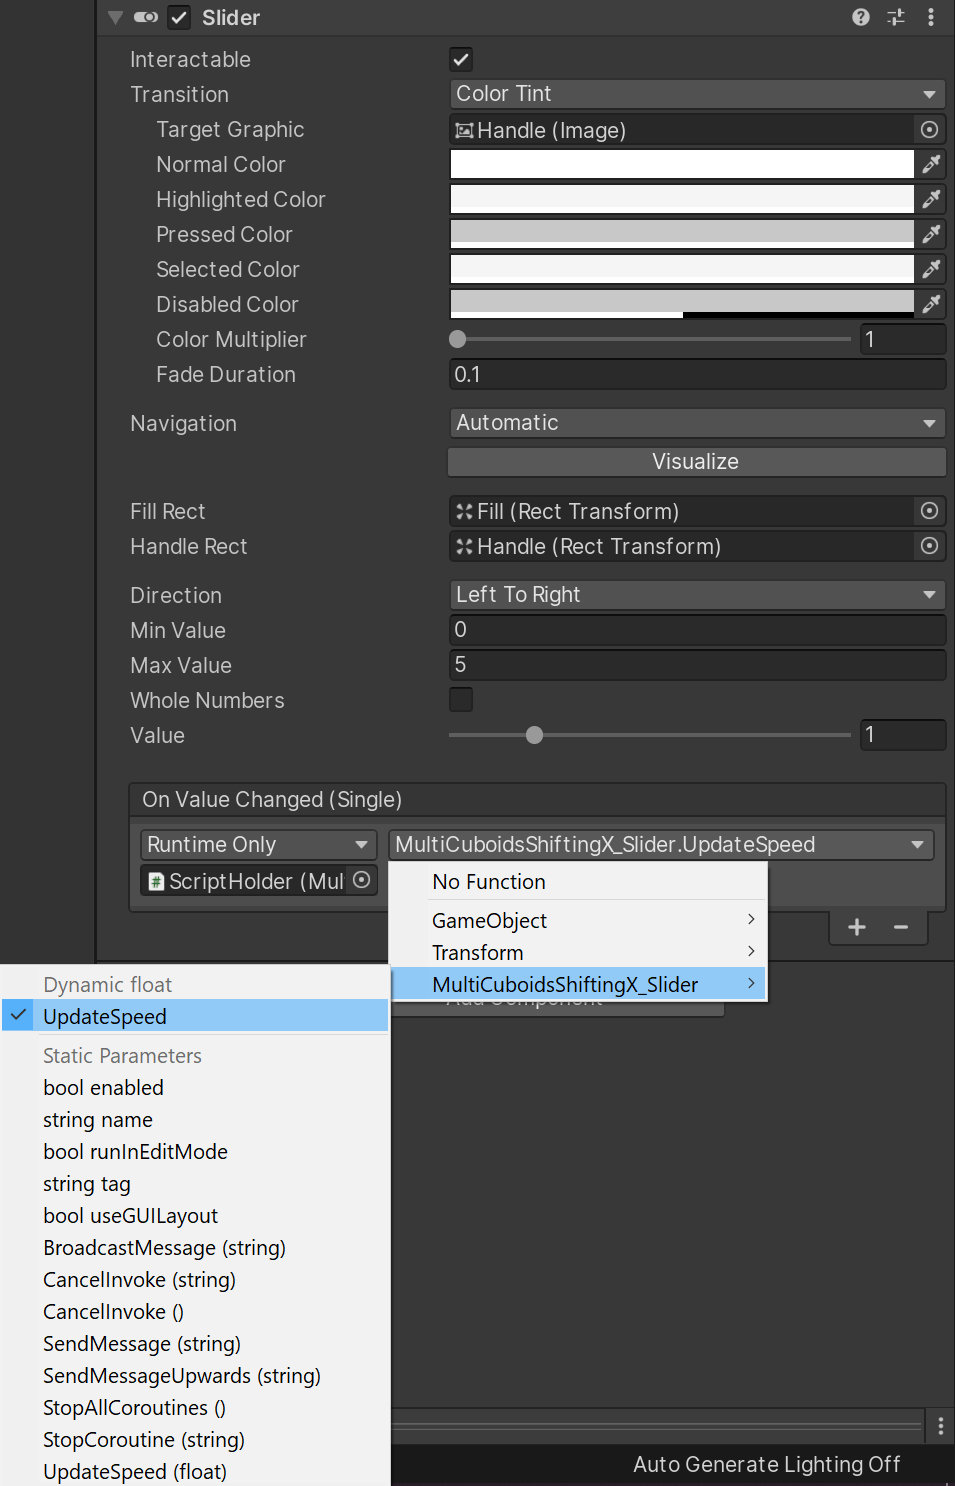
Selecting Dynamic Float Method